Cast iron care comes down to one cycle: cook with fat, wash gently, dry completely, and let repeated use build the seasoning. Lodge, the manufacturer behind most of the guidance below, says its cookware arrives pre-seasoned from the foundry and that every time you cook with oil or fat, you add another layer. When the surface goes wrong—sticky patches, black flakes, a dull gray finish—the fix is usually a single oven session, not a replacement pan. Here is the complete system: what seasoning actually is, how to re-season in the oven, and a symptom-by-symptom framework for diagnosing what your skillet is telling you.
Understanding Cast Iron Seasoning: The Foundation of Nonstick
Seasoning is not a coating you buy; it is a surface you grow. Each time you cook with oil or fat, heat bonds a thin layer of that fat onto the iron, and over time these layers stack into a strong, nonstick cooking surface. Lodge describes the process as cumulative: the more you cook, the thicker and more reliable the finish becomes.
That accumulation explains why a brand-new pan often looks patchy. According to Lodge, the initial layers of seasoning on a new skillet may be uneven, and that is normal. How and what you cook, hot spots on your stove, and your temperature setting all affect where and how the oil bonds to the metal. The manufacturer's advice is simply to keep cooking: those patchy layers eventually interlock, in Lodge's phrasing, "like puzzle pieces" to create a well-seasoned surface.
It also explains the most common failure mode. When oil sits on the pan in a thick layer instead of bonding as a thin one, it does not harden into seasoning—it stays gummy. The pan feels tacky, food sticks, and the surface never develops the hard, dark sheen you are aiming for. The remedy, as we will see in the troubleshooting framework, is heat, not elbow grease.
One scope note before the how-to: this guide covers modern, foundry-seasoned cast iron, drawing primarily on Lodge's manufacturer recommendations. It does not cover seasoning vintage, bare-metal skillets from scratch, and the advice may not apply to enameled cast iron or other cookware.
Step-by-Step Oven Seasoning for New or Restored Skillets
Oven re-seasoning is the reset button for a pan that has gone dull, gray, rusty, or flaky. Lodge calls it simple to do at home and recommends it for occasional instances when the surface needs rebuilding. Follow the sequence in order:
- Wash the pan. Use warm, soapy water to wash the skillet, then dry it completely with a paper towel or lint-free cloth. Thorough drying matters—trapped moisture is the enemy of both seasoning and bare iron.
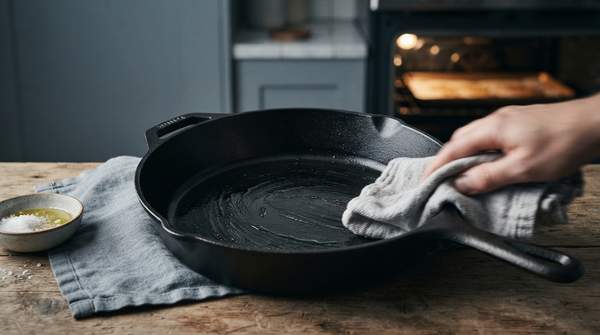
- Apply a thin coat of oil. Coat the entire pan with oil, then wipe it off as though you made a mistake applying it. The goal is the thinnest possible layer; excess oil is what creates sticky, gummy spots instead of a hard finish.
- Bake the pan. Place the oiled skillet in the oven and let heat polymerize the oil into the metal. For a pan that is already sticky, the technique described by Jeff Rogers in Southern Cast Iron is to put the skillet in the oven, turn it up to 500 degrees, and bake for one hour once it reaches temperature.
- Let it cool. Remove the pan carefully and let it cool completely before handling or cooking. The finish should feel hard and smooth, not tacky.
The critical variable is oil quantity, not oven skill. The sticky-residue question answered in Southern Cast Iron came from a reader whose freshly re-seasoned skillet had a tacky finish, and the diagnosis was straightforward: too much fat or oil applied during seasoning. The fix was to bake the residue until it polymerized and became part of the finish. If your re-seasoning attempts keep producing gum, you are applying too much oil—wipe it off twice if you have to.